Why Proper Lighting System Installation Transforms Your Home
Lighting system installation transforms your home's look and feel. Whether replacing an old fixture or adding new lights, the right lighting makes any space more functional and welcoming.
Essential Steps for Lighting System Installation:
- Turn off power at the circuit breaker and verify with a voltage tester.
- Remove the old fixture by disconnecting wires and unscrewing hardware.
- Install a new mounting bracket and check the junction box's weight capacity.
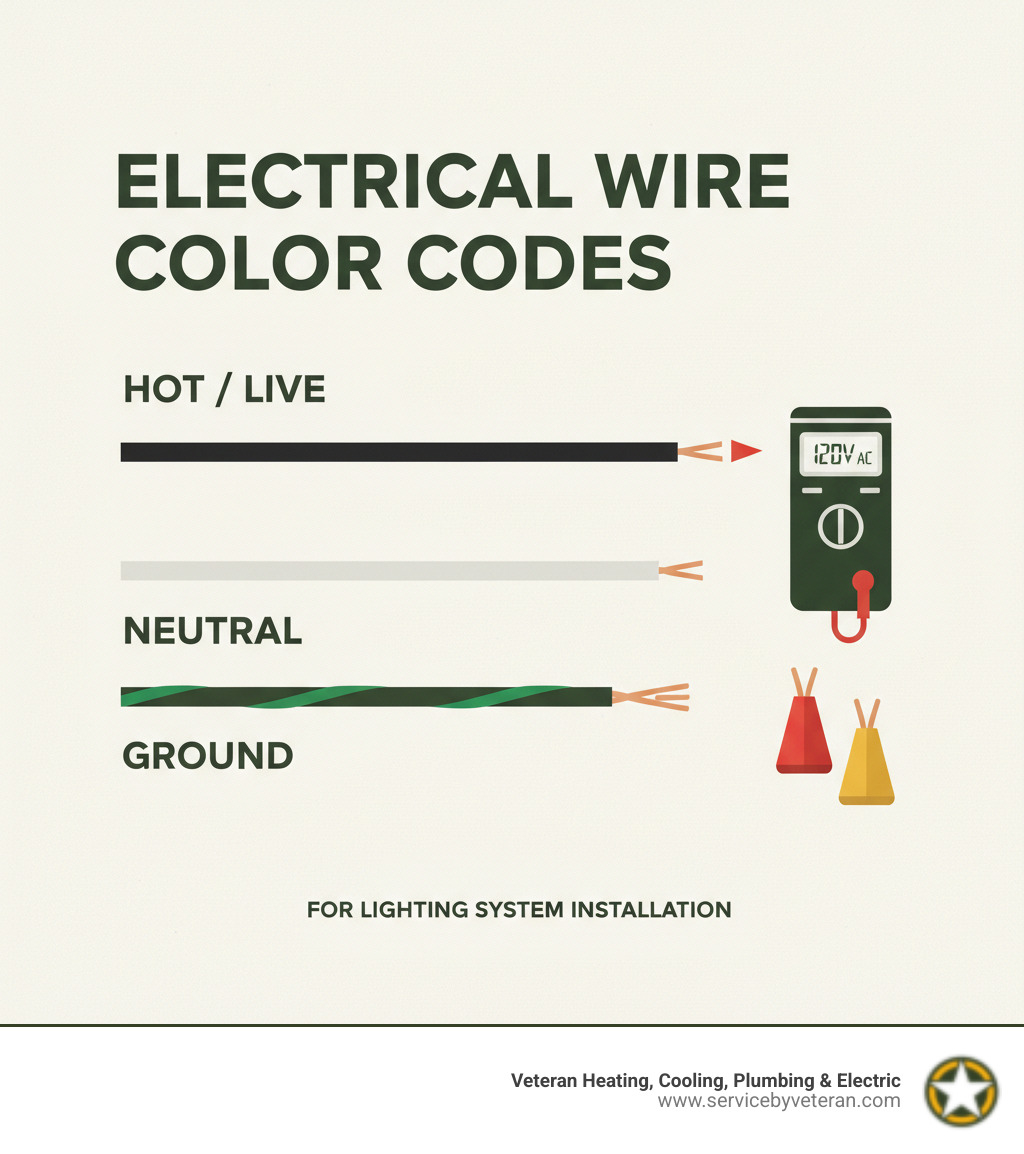
- Connect wires by matching colors: black to black, white to white, and ground to ground.
- Mount the new fixture and secure all hardware before restoring power.
- Test the installation to ensure it works properly.
Most standard light fixture installations take 1-4 hours. Simple replacements often require 60-90 minutes, while installations with new wiring can take longer.
Safety is critical when working with electricity. Always use a voltage tester to confirm the power is off. If you're uncomfortable with electrical work, it's time to call a professional electrician.
Installation costs vary, with electricians typically charging $75-$200 per fixture or $50-$105 per hour.
My U.S. Army experience taught me that lighting system installation demands precision and safety. Whether it's a simple fixture swap or a whole-home upgrade, the fundamentals of electrical safety and proper installation are constant.
Before You Begin: Essential Prep and Safety
Success in lighting system installation depends on thorough preparation and strict safety protocols. Rushing into electrical work without planning is risky; a little preparation ensures safety and professional results.
Essential Safety Precautions
Electricity is unforgiving, so safety comes first. Many injuries from DIY electrical work are preventable with the right precautions.
Turn off the power at the circuit breaker before touching any wires. This is your lifeline. If you're unsure which breaker to use, turn off the main breaker for the house. It's a small inconvenience for your safety.
Always verify the power is off with a voltage tester. This device detects live electricity. Never skip this step; electricity is invisible until it's too late.
Use your ladder safely. Place it on stable, level ground, maintain three points of contact, and avoid overreaching. It's safer to move the ladder than to risk a fall.
Use insulated tools for extra protection against shock. Wear safety glasses to protect your eyes from debris and consider work gloves for handling sharp edges.
For heavy fixtures like chandeliers, get a helper. Even experienced electricians work in pairs for complex installations.
Tools and Materials for a Standard Installation
The right tools make your lighting system installation safer and more efficient. These essentials will handle most jobs:
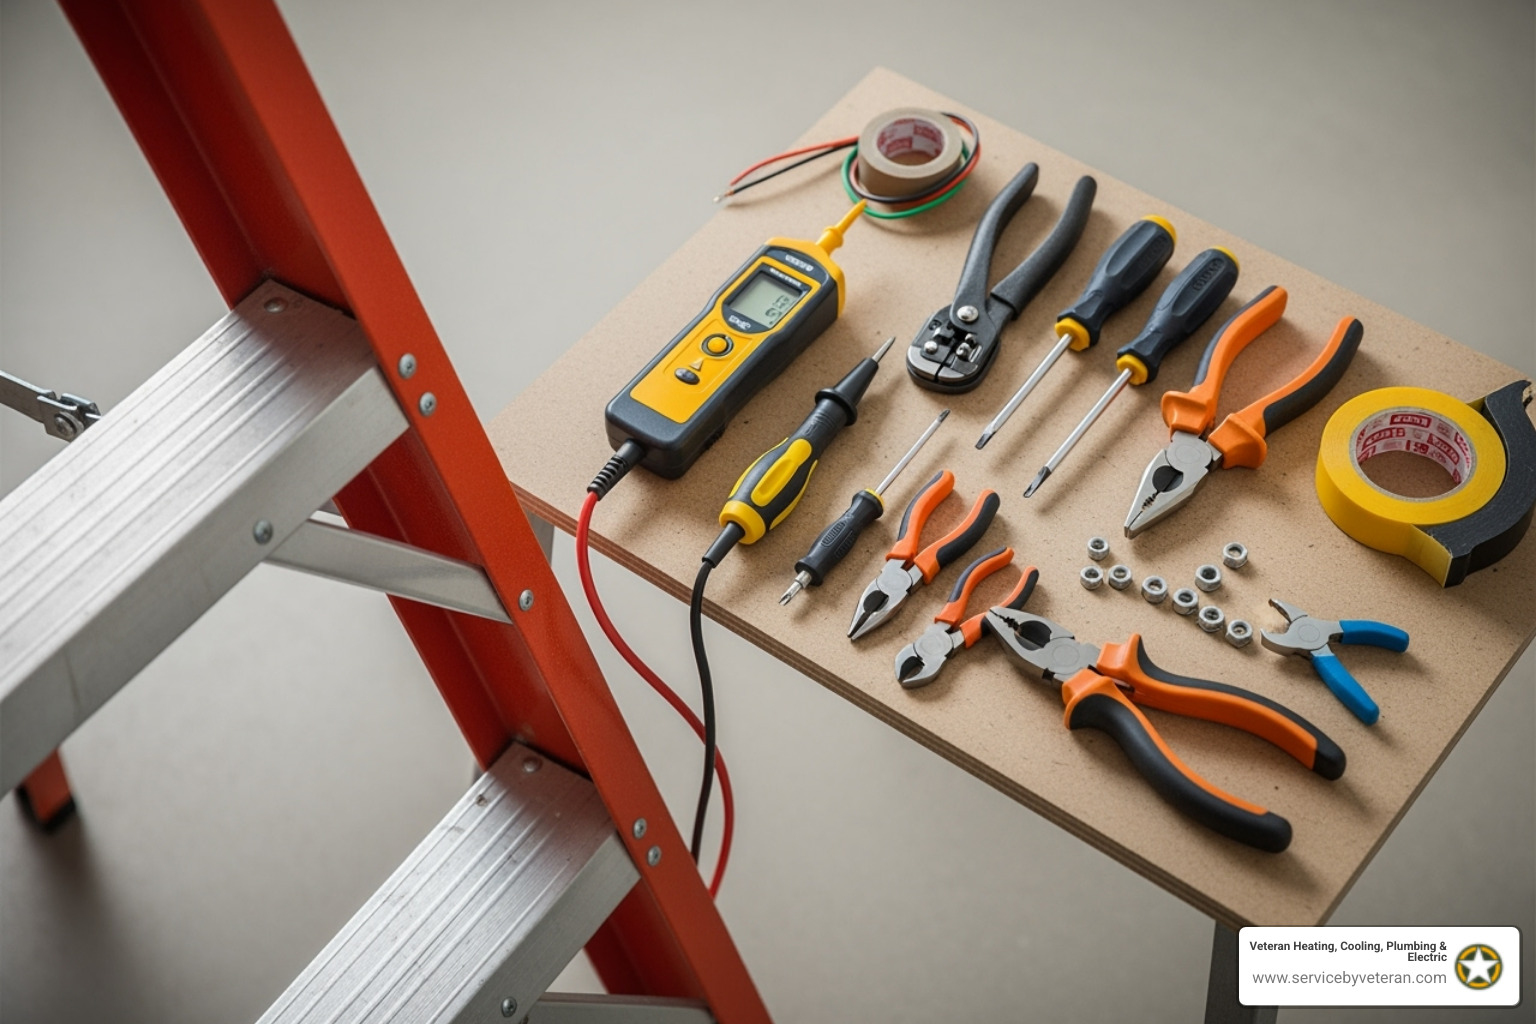
Essential Tools:
- Voltage tester - To detect live electricity
- Wire strippers and cutters - For preparing wire connections
- Screwdrivers (Phillips and flathead) - For mounting hardware
- Pliers (needle-nose and standard) - For twisting wires
- Sturdy ladder - At the appropriate height
- Wire nuts - To secure electrical connections
Your new fixture includes mounting hardware. You'll also need compatible light bulbs. Check the fixture's maximum wattage rating before buying; LED bulbs are the best choice for efficiency and longevity.
Planning Your Lighting Layout
Great lighting requires thoughtful planning. Before installing, consider how you use each room. Kitchens need bright, focused light, while living rooms benefit from softer, ambient light. Bedrooms often need a mix of both.
- Task lighting illuminates specific work areas like kitchen counters.
- Ambient lighting provides overall room illumination.
- Accent lighting highlights artwork or architectural features.
Spacing is crucial for a professional look. For recessed lights in rooms with 8-foot ceilings, space them about 4 feet apart for even coverage.
Use a tape measure and pencil to mark fixture locations before cutting. Many recessed lights include paper templates to help ensure perfectly sized openings. Planning your layout prevents costly mistakes.
A Step-by-Step Guide to Your Lighting System Installation
Let's explore the lighting system installation process. Follow these steps carefully. A standard fixture replacement takes about an hour. The key is to take your time, especially with electrical connections.
Step 1: Removing the Old Light Fixture
Safely removing the old fixture is your first step. It's more straightforward than it seems.
Double-check that the power is off with your voltage tester. This quick step prevents shocks.
Support the fixture before loosening anything. Get a helper for heavy fixtures like chandeliers to prevent them from falling and causing damage or injury.
Remove the canopy or decorative cover by unscrewing the nuts or screws holding it to the ceiling.
Disconnect the wires. First, take a photo of the wiring for reference. You'll typically see black (hot), white (neutral), and ground (green/copper) wires connected with wire nuts. Untwist the wire nuts to separate the wires.
Finally, remove the old mounting bracket from the electrical box by unscrewing it.
Step 2: Key Steps for a DIY Lighting System Installation
With the old fixture removed, it's time to prepare for the new installation.
Check your junction box capacity. This is critical for safety. Standard boxes hold up to 50 pounds. Heavier fixtures require a heavy-duty box anchored to a ceiling joist to prevent the fixture from falling.
Install the new mounting bracket that came with your fixture. Attach it firmly to the electrical box so it sits flush with the ceiling.
Prepare your new fixture. Assemble it according to the manufacturer's instructions. For pendants or chandeliers, adjust the chain or cord length to the desired height now. Thread the fixture wires through the chain or cord.
Step 3: Connecting the Wires
Connecting wires is the core of your lighting system installation. Be methodical and make solid connections.
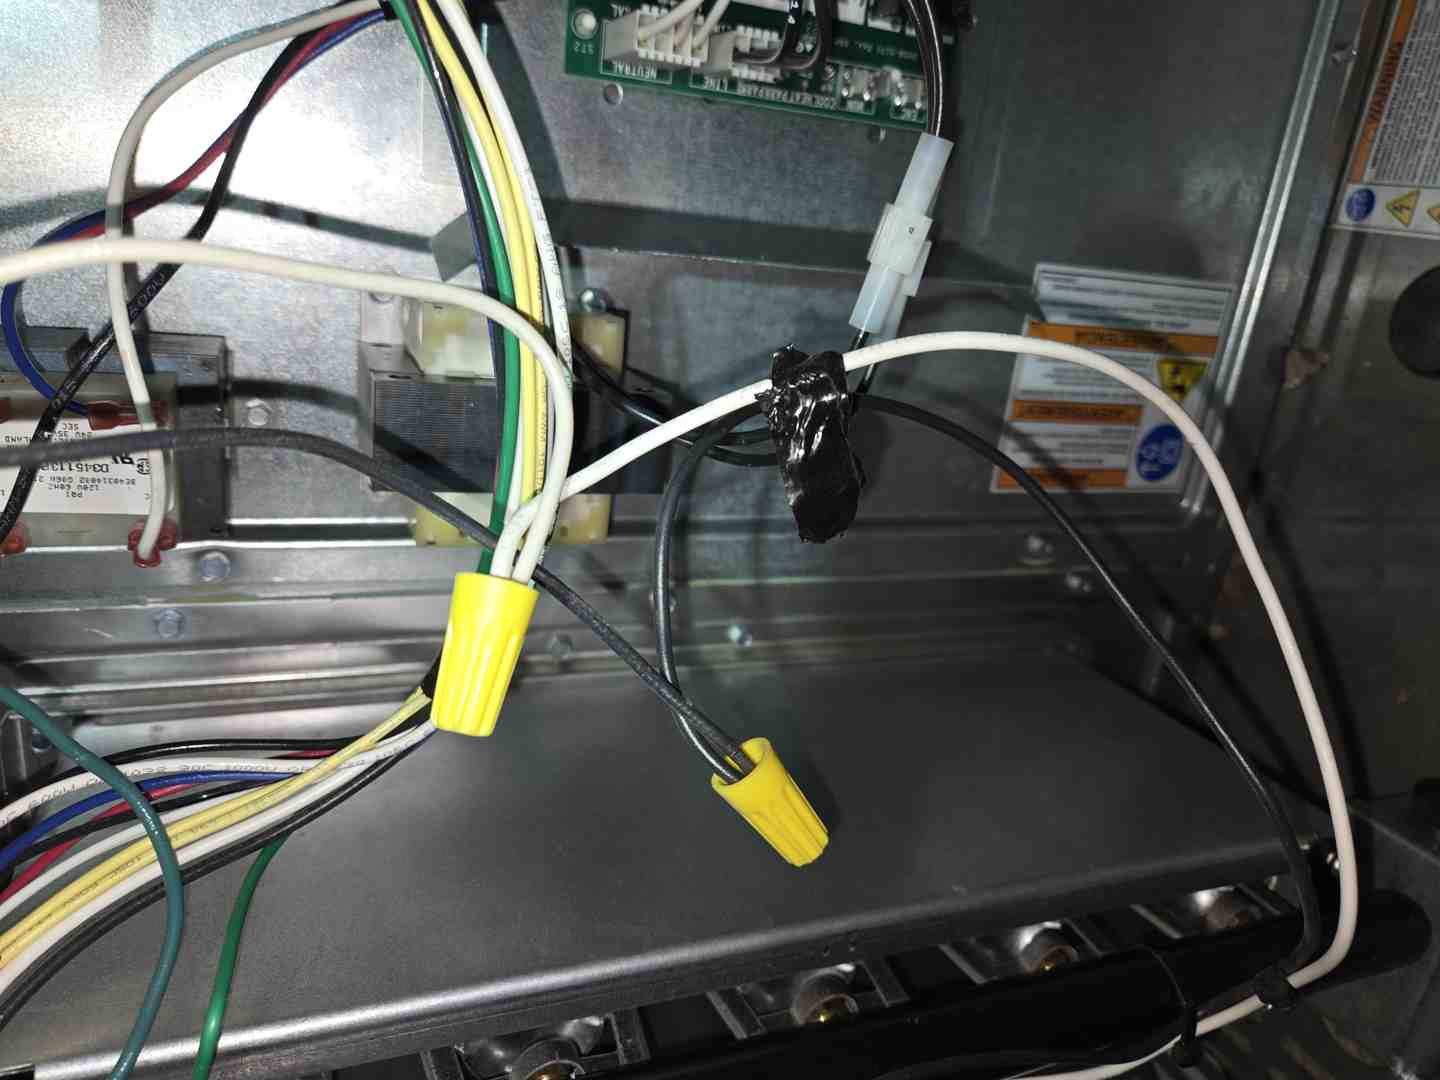
Match the wire colors: connect black to black (hot), white to white (neutral), and ground to ground (bare copper or green).
Twist the bare wire ends together and secure each connection with a wire nut. Twist until snug, then gently tug each wire to ensure it's held securely. A loose connection is a fire hazard.
Carefully tuck all connected wires back into the electrical box, ensuring none are pinched. This is important for safety and a flush fit.
Step 4: Mounting and Securing the New Fixture
This final step completes your lighting system installation.
Attach your fixture to the mounting bracket using the provided hardware. A helper makes this much easier with heavy fixtures.
Secure the canopy (the decorative cover) firmly against the ceiling using its decorative nut or screws.
Install your light bulbs, ensuring they are the correct wattage. LED bulbs are the best choice for energy efficiency, low heat, and long life.
Restore power at the circuit breaker and test your new fixture. If it doesn't work, turn the power off and double-check your wire connections.
Completing a DIY lighting system installation saves money and builds valuable skills.
Installation Guides for Popular Lighting Fixtures
While basic lighting system installation steps are consistent, different fixtures have unique challenges. Let's review the most popular types.

Installing Pendant Lights and Chandeliers
These fixtures transform a room, but their lighting system installation requires extra attention. Adjust the height before installation, aiming for 30-36 inches above a dining table or 28-34 inches above a kitchen island. Assemble the fixture on the ground first, following the instructions. Most importantly, ensure the junction box can support the fixture's weight. Standard boxes hold up to 50 pounds; heavier fixtures require a fan-rated box anchored to a ceiling joist for safety.
Installing Recessed Lighting
Recessed lights offer a clean, modern look. The lighting system installation is more involved but worth the effort. Plan your layout carefully, spacing lights about four feet apart for 8-foot ceilings. Use a hole saw for clean cuts, but first, use a stud finder to check for joists or pipes. Canless (wafer) lights are slimmer and often easier for DIY projects than traditional can lights. Wire is typically "daisy-chained" from one light to the next.
Installing Wall Sconces
Wall sconce lighting system installation is similar to ceiling fixtures but on a wall. Install them at the correct height: 60-65 inches from the floor for general lighting or at face level beside a bathroom mirror. Use a level to ensure sconces are aligned, especially in pairs. Most are hardwired, but plug-in versions are an easier option with visible cords.
Installing Ceiling Fans with Lights
Ceiling fan lighting system installation requires special attention to support and wiring. A fan-rated electrical box is non-negotiable, as standard boxes can't handle the weight and vibration. Assemble the fan on the ground first. The wiring often involves an extra wire (usually blue) for the light kit to allow separate control; follow the manufacturer's diagram exactly. Attach the fan blades last to prevent damage.
Installing Outdoor Lighting
Outdoor lighting system installation requires protection from weather and moisture. Use fixtures rated for the outdoors: "wet location" for direct exposure and "damp location" for covered areas. GFCI protection is required for all outdoor circuits to prevent shock. Use weatherproof electrical boxes and choose durable, corrosion-resistant materials like brass or stainless steel.
For complex outdoor work or code questions, our team at Veteran Heating, Cooling, Plumbing & Electric can help. We serve Denver, Lakewood, Littleton, and surrounding communities. More info about our electrical services
Pro Tips, Compliance, and When to Call an Electrician
Even experienced DIYers can face issues during a lighting system installation. Knowing common pitfalls and when to call a pro is key to success.
Common Mistakes in Lighting System Installation
Here are common, preventable mistakes to avoid:
- Overloading circuits: Adding too many lights can trip breakers or cause fires. LEDs use less power, allowing more fixtures on one circuit.
- Incorrect wiring: Reversing hot and neutral wires can cause flickering or safety hazards. Take your time and photograph the original wiring for reference.
- Loose connections: These can cause arcing and heat, creating a fire risk. After securing a wire nut, give each wire a gentle tug to ensure it's solid.
- Ignoring junction box weight limits: Hanging a heavy fixture on an underrated box can cause it to fall, leading to expensive damage and serious injury.
- Not using a voltage tester: Always use a voltage tester to confirm the power is off, even if you're sure you flipped the right breaker. This simple tool can save your life.
Ensuring Compliance with Electrical Codes
Electrical codes are safety guidelines. The National Electrical Code (NEC) is the standard, but local rules for your lighting system installation may also apply. Before major projects involving new wiring, call your local building department to check for permit requirements. Simple fixture swaps usually don't need permits, but adding new wiring often does.
For detailed national standards, you can reference the National Electrical Code, but be aware it is a dense, technical document.
When to Hire a Professional Electrician
Knowing when to call a professional electrician is a sign of wisdom. Some lighting system installation projects require an expert.
Call a pro for:
- Complex wiring: Non-standard colors or multiple switches require professional troubleshooting.
- Old or aluminum wiring: Aluminum wiring, common in homes from the 60s and 70s, is a fire hazard if not connected properly. This is not a DIY job.
- Installing in a new location: Running new wire, cutting into walls, and possibly upgrading your panel are jobs for an expert.
- High ceilings or heavy fixtures: These present safety and logistical challenges best left to professionals.
The most important rule: If you're ever unsure, stop and call a professional. The consequences of electrical mistakes are severe. At Veteran Heating, Cooling, Plumbing & Electric, we help homeowners in Aurora, Westminster, Arvada, Castle Rock, and surrounding areas. Contact Us for professional peace of mind.
Frequently Asked Questions about Lighting Installation
Here are answers to common questions about lighting system installation.
How do I properly dispose of old light bulbs and fixtures?
Properly disposing of old bulbs and fixtures is important for safety and the environment.
- Incandescent and halogen bulbs can be thrown in your regular household trash.
- CFLs (compact fluorescent bulbs) contain mercury and cannot go in the trash. Recycle them at most hardware stores or local recycling centers.
- Fluorescent tubes also contain mercury and require special disposal. Check with your local waste management facility.
- LED bulbs are electronic waste. Check for local or retail recycling programs.
- Old fixtures can often be recycled. Check with your local recycling center.
What are the advantages of using LED lighting?
LEDs offer numerous benefits beyond just energy savings:
- Energy efficiency: LEDs use a fraction of the power of incandescent bulbs, lowering your electric bill and creating a reduced circuit load.
- Longer lifespan: LEDs last for tens of thousands of hours, meaning you'll change bulbs far less often.
- Less heat output: LEDs produce less heat, reducing fire risk and potentially lowering cooling costs.
- Better light quality: LEDs offer a wide range of color temperatures to suit any room's mood or function.
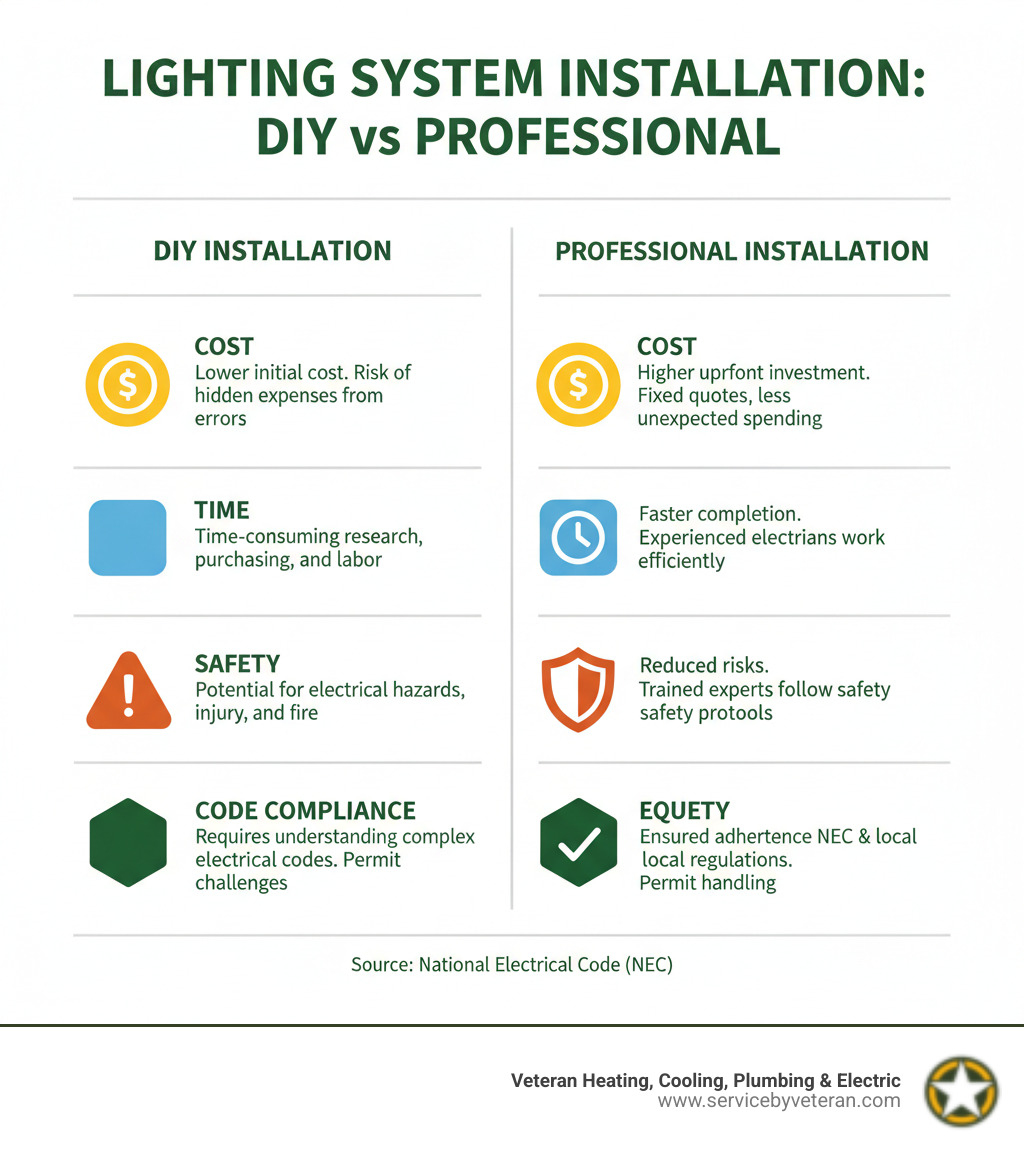
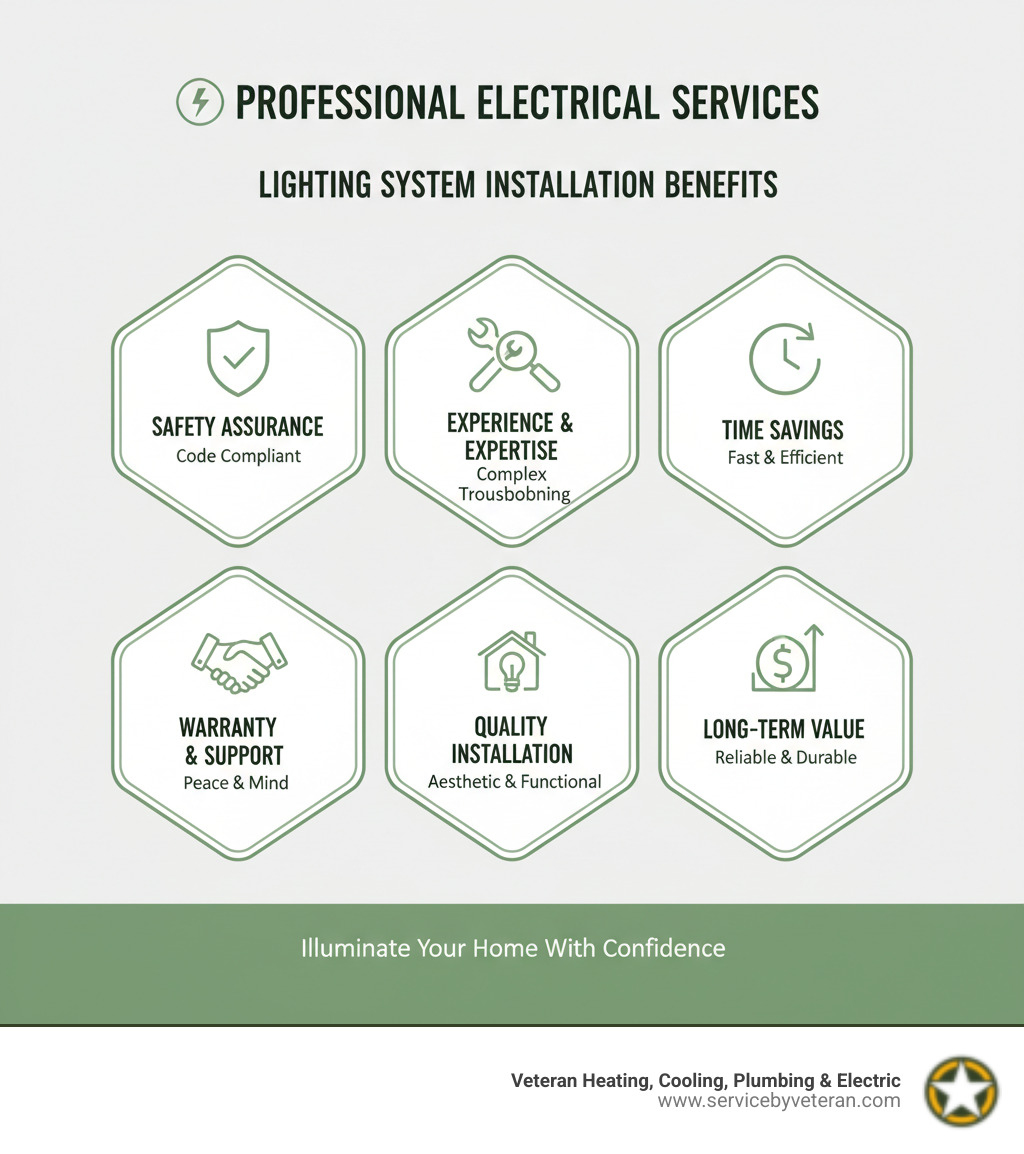
What are the benefits of professional installation versus a DIY approach?
While DIY can be rewarding, professional lighting system installation has key benefits.
- Safety assurance: A licensed electrician ensures safety, handling complex wiring and spotting potential hazards.
- Code compliance: Professionals guarantee your installation meets all legal requirements for inspections and insurance.
- Experience with troubleshooting: Their expertise saves time and frustration by quickly diagnosing and fixing problems.
- Warranty on workmanship: A warranty provides peace of mind. We offer a lifetime warranty on parts and labor.
- Time savings: A professional can complete an installation in 1-4 hours, much faster than a typical DIY project.
DIY is great for simple swaps, but for complex jobs or guaranteed results, a professional delivers quality, safety, and peace of mind.
Conclusion
For any lighting system installation, the fundamentals are always preparation, safety, and attention to detail. Each step is crucial to changing your space.
Proper lighting does more than illuminate a room; it creates ambiance, provides functional task light, and can even boost your home's value. A good lighting system installation makes every room more welcoming.
My Army experience taught me that precision and following procedures are critical in electrical work. There are no shortcuts when it comes to safety.
However, some projects are too complex for DIY. For heavy chandeliers, new circuits, old wiring, high ceilings, or any time you feel unsure, it's wise to call a professional for complex installations.
Our veteran-led team at Veteran Heating, Cooling, Plumbing & Electric brings a safety-first mindset to every project. We proudly serve Denver, Lakewood, Littleton, Wheat Ridge, Aurora, Westminster, Arvada, Castle Rock, and surrounding communities with personal, honest service.
Every installation includes our lifetime warranty on parts and labor and a money-back guarantee. We stand behind our work.
Ready to brighten your home with confidence? Explore our expert electrical services today, and let us illuminate your world.
ABOUT Veteran Heating, Cooling, Plumbing & Electric
Veteran Heating, Cooling, Plumbing & Electric was founded on the belief that service should be personal, honest, and community-focused. Our team is built around integrity, professionalism, and a true commitment to your home’s comfort and safety.
Led by a U.S. Army veteran with over 30 years of industry experience, we’re proud to remain locally owned and operated. Every technician, plumber, and electrician is EPA-certified, background checked, and driven to exceed expectations.
- 24/7 ServiceWe offer weekend & 24/7 emergency service. We’re here whenever you need us—day, night, or weekend, no exceptions.
- $0 Trip FeesNo dispatch or trip fees. You’ll never pay just for us to show up—service starts when the work does.
OUR SERVICES
AIR CONDITIONING
.jpg)
We offer specialty and seasonal services like indoor air quality upgrades, pre-winter furnace checks, and summer AC tune-ups to keep your home prepared year-round.
Our Primary Air Conditioning Services Include:
Don't see the service you need? Call our Team today!
PLUMBING
From leaks to full system installs, our plumbing services cover everything you need for a safe, reliable home water system, 24/7.
Our Primary Plumbing Include:
- Water Heater Replacement
- Water Heater Repair
- Trenchless Sewer Line
- Water Filtration
- Slab Leak
- Sewer Line Repair
Don't see the service you need? Call our Team today!
ELECTRICAL

Our electrical services ensure your home stays safe and powered, from routine fixes to complete system upgrades.
Our Primary Electrical Services Include:
- House Rewiring
- Electrician
- Electric Panel Upgrade
- Electric Panel Replacement
- EV Chargers
- Whole House Generator
Don't see the service you need? Call our Team today!
HEATING
.jpg)
We install, repair, and maintain heating & furnace systems with expert care to keep your Colorado home comfortable and energy-efficient year-round.
Our Primary Heating Services Include:
- Heating Installation
- Heating Replacement
- Heating Maintenance
- Heating Repair
- Heating Service
- Heating Tune-Up
Don't see the service you need? Call our Team today!