Why Ductless Systems Are Revolutionizing Home Comfort
Ductless air conditioning installation is a popular upgrade for homeowners who want efficient, flexible cooling. Unlike central air, ductless mini-split systems don't need extensive ductwork, offering a simpler installation, superior energy efficiency, and zoned comfort control. Key benefits include:
- Energy Savings: Up to 30% more efficient than central AC.
- No Ductwork: Eliminates energy loss from leaky ducts.
- Zoned Control: Cool only the rooms you use.
- Quick Installation: Most systems are installed in one day.
- Quiet Operation: Indoor units are as quiet as a whisper.
- Year-Round Comfort: Heat pump models provide both heating and cooling.
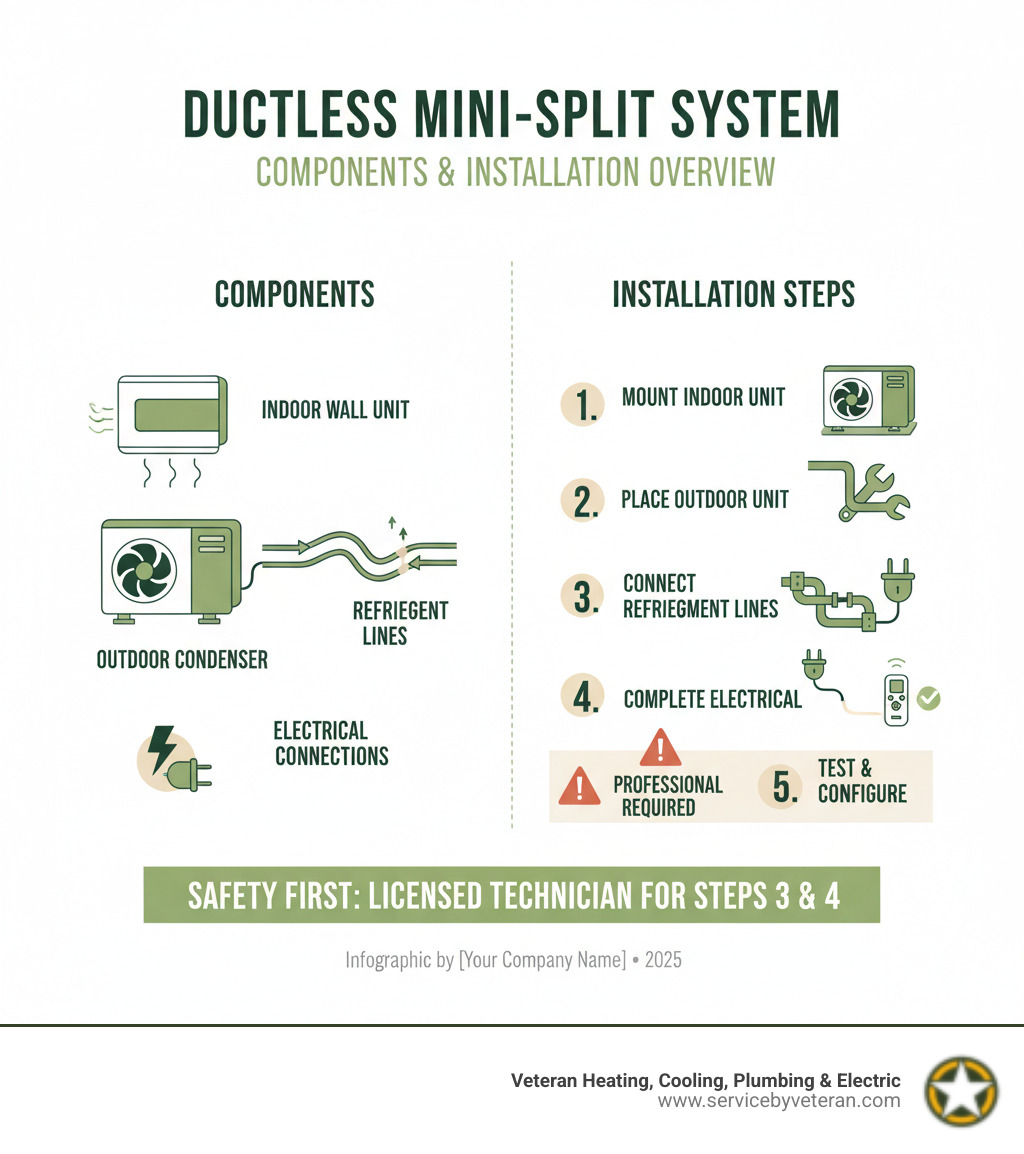
The installation process combines DIY-friendly mounting with professional technical work. While homeowners can mount the units, licensed professionals must handle refrigerant and electrical connections for safety and warranty protection.
I'm Mike Townsend. My eight years managing precision cooling systems in the U.S. Army give me a unique insight into the technical needs of ductless air conditioning installation. I'm here to guide you through the process, emphasizing where professional expertise is crucial.
Why Choose a Ductless Mini-Split?
With a ductless mini-split, you can cool your home office without cooling the entire house. That's the power of zoned heating and cooling—you only condition the spaces you're actually using, saving energy and money.
Energy efficiency is where ductless systems excel. These units can achieve SEER ratings up to 35, while traditional central air often maxes out around 26. As the Ductless Heating & Cooling page on the ENERGY STAR website highlights, this means significant savings on your monthly energy bills. Other key benefits include:
- Improved Indoor Air Quality: Each indoor unit has built-in filtration that removes dust, pollen, and other airborne particles right at the source.
- Quiet Operation: Ductless units operate at whisper-quiet levels, making them ideal for bedrooms and offices.
- Installation Flexibility: They are perfect for older homes without ductwork, garage workshops, or bonus rooms. Many models also offer heat pump functionality for efficient heating in colder months.
Advantages Over Traditional Central Air
Traditional central air systems can lose up to 30% of their energy through ductwork. Ductless air conditioning installation eliminates this problem entirely because there is no ductwork required. This means every bit of conditioned air goes exactly where it's supposed to.
Individual room temperature control ends thermostat battles and allows for personalized comfort. The installation process is also faster and less invasive, with most jobs completed in a single day without tearing into walls and ceilings.
Understanding Energy Efficiency and SEER Ratings
SEER (Seasonal Energy Efficiency Ratio) measures an air conditioner's efficiency—the higher the rating, the less electricity it uses. While traditional systems have SEER ratings between 14 and 26, ductless mini-splits can reach an impressive 35 SEER. According to the U.S. Department of Energy, this makes them about 30% more efficient than conventional central air.
This efficiency comes from inverter technology. Instead of cycling on and off, inverter-driven compressors adjust their speed to match your exact cooling needs. This provides more consistent temperatures and lower energy bills.
Pre-Installation Prep: Sizing, Placement, and Tools
Proper preparation is the foundation of a successful ductless air conditioning installation. Planning now prevents poor performance later. Getting the sizing wrong can lead to an undersized unit that runs constantly or an oversized one that fails to remove humidity, leaving your home feeling damp.
Choosing the Right Size and Type for Your Home
Sizing starts with BTU calculations. A general rule is 20 BTUs per square foot, but factors like high ceilings, window orientation, and insulation quality will influence the final number. For example, a 150-250 sq. ft. room typically needs 6,000 BTUs, while a 1,000-1,200 sq. ft. space may require 21,000 BTUs.
- Single-zone systems are ideal for a single area, like a home office or addition.
- Multi-zone systems connect several indoor units to one outdoor condenser, allowing independent temperature control in different rooms.
Indoor units come in several types. Wall-mounted units are the most common, but ceiling cassettes offer a discreet look, and floor-mounted units work well in rooms with limited wall space.
Best Practices for Positioning Your Indoor and Outdoor Units
Strategic placement is key for optimal performance.
- Indoor Unit: Mount on an exterior wall, at least six feet from the floor, and away from direct sunlight or heat sources. Ensure 4-6 inches of clearance on all sides for airflow.
- Outdoor Unit: Place the condenser on a stable, level foundation (like a condenser pad) with at least 24 inches of clear space around it for airflow and maintenance. The north or east side of your home is ideal to minimize sun exposure.
- Condensate Drain: When drilling the hole for the line set, angle it slightly downward to the outside to ensure proper drainage.
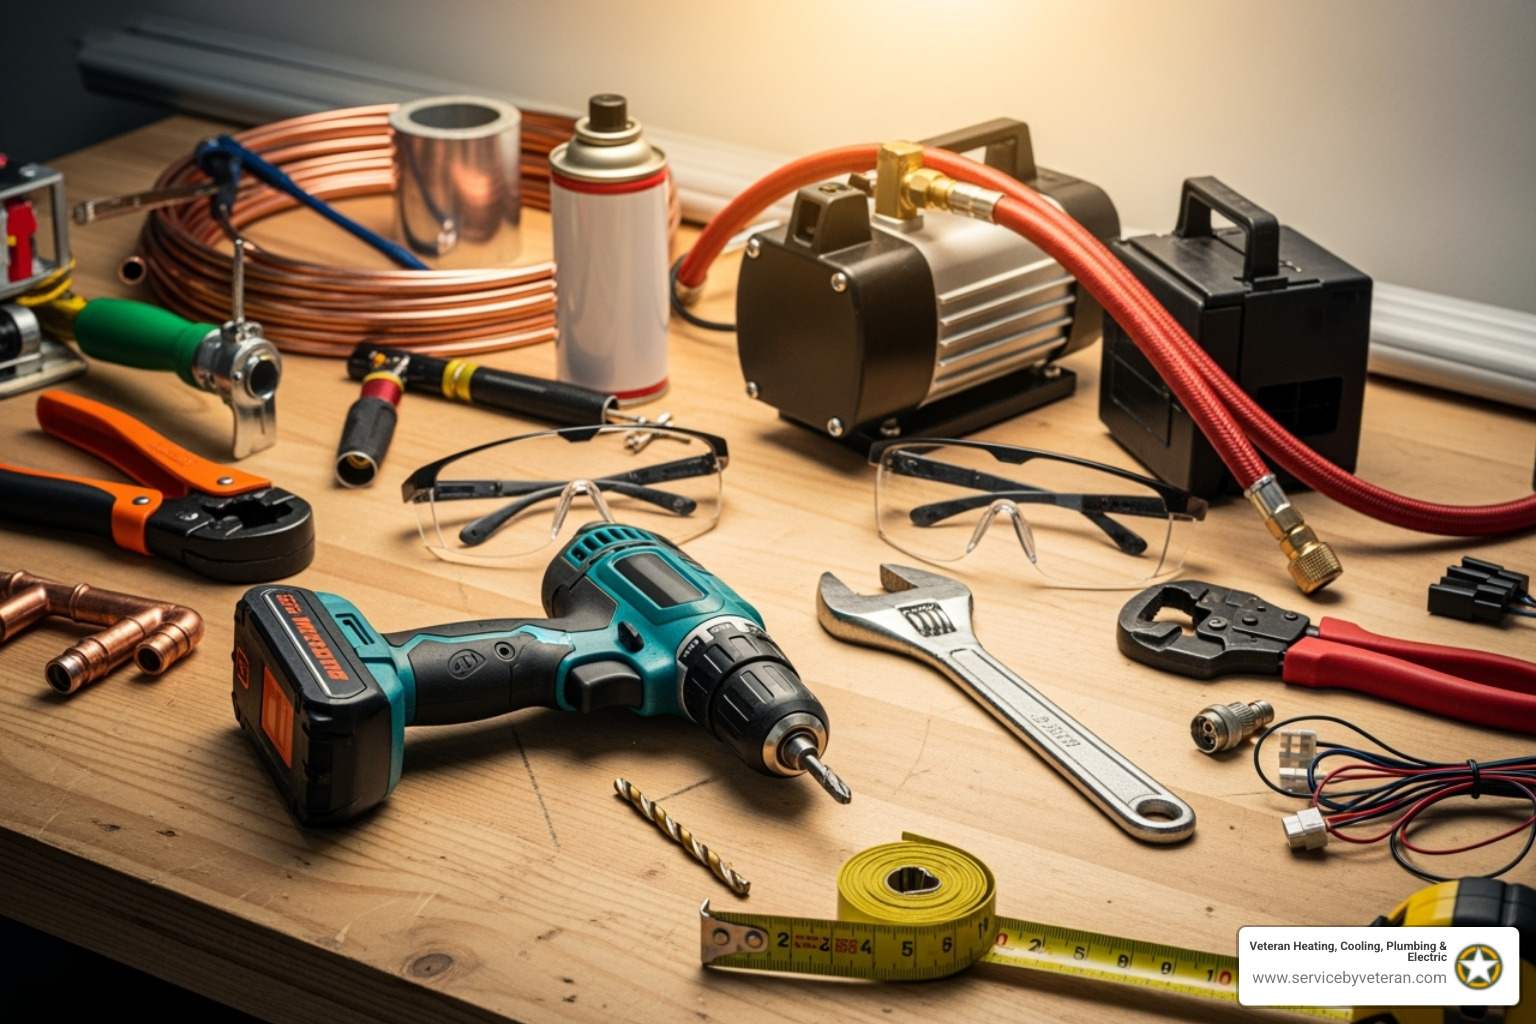
Essential Tools and Materials for a DIY Installation
While some tasks require a pro, the physical mounting is very DIY-friendly. Having the right tools and materials is essential.
- Essential Tools: Stud finder, level, power drill with bits, 2-3 inch hole saw, measuring tape, pliers, screwdrivers, safety glasses, and gloves.
- Required Materials: Condenser pad or wall bracket, line set cover kit, electrical disconnect box, line set insulation, and sealant for wall penetrations.
DIY mini-split kits range from $700 to $2,000. Even with a kit, electrical and refrigerant work require a licensed professional to ensure safety and protect your warranty.
A DIY Guide to Ductless Air Conditioning Installation
These steps focus on the physical mounting and positioning of your mini-split system, which are well within the capabilities of most DIY enthusiasts. Handling these tasks yourself can save significantly on labor costs, while leaving the technical connections to certified professionals.
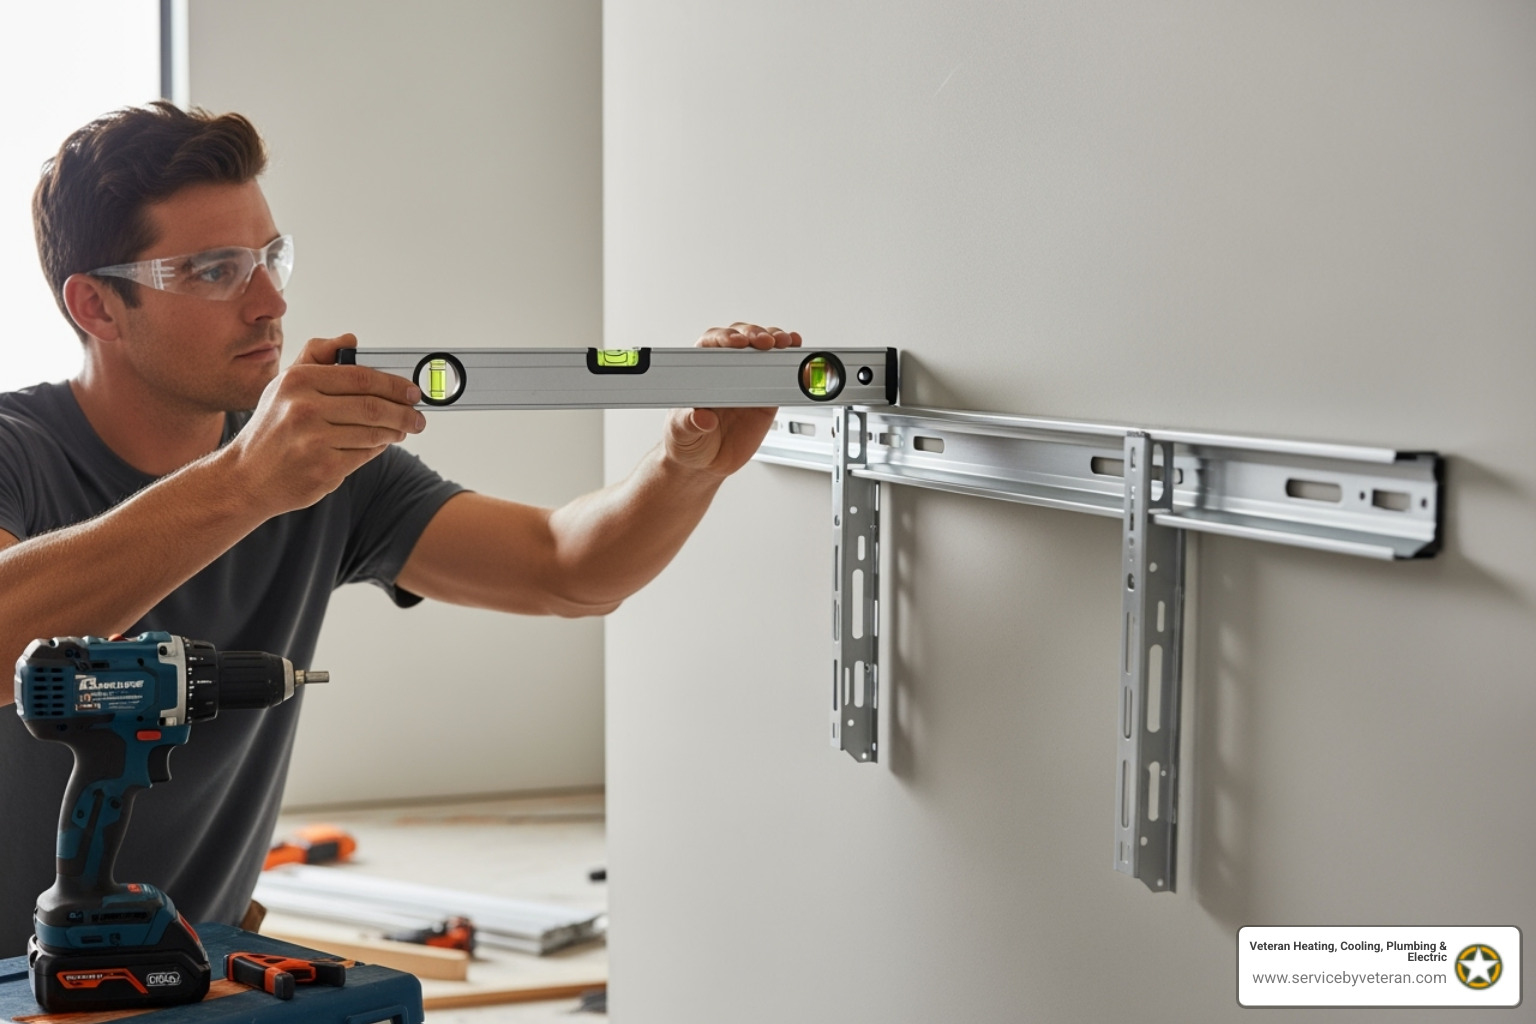
Step 1: Install the Indoor Unit's Mounting Bracket
Use a stud finder to locate at least two wall studs for secure support. Position the bracket at least six feet from the floor, using a level to ensure it is perfectly straight—this is critical for proper drainage. Mark the screw holes, drill pilot holes, and secure the bracket with heavy-duty screws. Test its stability before moving on.
Step 2: Drill the Hole for the Line Set and Drain Hose
From inside, drill a pilot hole through the wall, angling it slightly downward toward the outside for condensate drainage. Before drilling the main opening, check the exterior for any obstructions like wiring or plumbing. Use a 2-3 inch hole saw to create the opening. For a cleaner finish, drill halfway from the inside, then complete the hole from the outside to prevent splintering.
Step 3: Mount the Indoor Air Handler
With a helper, carefully uncoil the line set (if pre-connected) and bundle it with the drain line and electrical wiring. Keep the drain line at the bottom of the bundle. Feed the bundle through the wall hole while your helper guides it from outside to prevent kinking. Lift the indoor unit and hang it securely on the mounting bracket. You should feel it click into place.
Step 4: Install the Outdoor Condenser Unit
The outdoor unit requires a solid, level foundation. A plastic condenser pad is a good option for ground installations. If wall-mounting, ensure the bracket can handle the weight and vibration. Place the condenser on the base, ensuring it's level and has at least 24 inches of clearance on all sides for airflow. Route the line set neatly from the indoor unit to the outdoor unit, avoiding sharp bends.
Critical Connections: When to Call a Professional
The indoor and outdoor units are mounted, but now it's time to call in licensed HVAC technicians and electricians. The remaining steps involve high-voltage electricity and pressurized refrigerants, which pose serious safety risks and require specialized training and tools.

The Risks of DIY Electrical and Refrigerant Work for your ductless air conditioning installation
Attempting the final connections yourself is dangerous and can damage your new system. Here's why you need a professional:
- High-Voltage Dangers: Mini-splits require a dedicated circuit (often 220-volt) connected to your main panel. A licensed electrician must perform this work to comply with the National Electrical Code and prevent fire hazards. For more on our electrical services, see more info about our expert electrical services.
- Refrigerant Handling: Federal law requires EPA 608 certification to handle refrigerants. The process involves connecting lines, vacuuming the system to remove moisture, and charging it with a precise amount of refrigerant using tools like vacuum pumps and manifold gauges.
- Voided Warranty: Most manufacturers require proof of professional installation to honor the warranty. Local building codes also often mandate licensed work for these connections.
Understanding Costs, Rebates, and the Value of a Pro
While DIY kits cost $700 to $2,000, a full professional installation for a single-zone system typically runs $2,000 to $5,000. Multi-zone systems can range from $5,000 to $15,000. Labor accounts for 50-60% of the total, and new electrical work can add $500 to $2,000.
This professional investment ensures your system runs efficiently, lasts longer, and remains under warranty. You may also qualify for ENERGY STAR rebates and tax credits that help offset the cost. Our maintenance plans can also protect your investment long-term. Think of it as insurance for your comfort and safety.
Post-Installation: Maintenance and Long-Term Care
Your ductless air conditioning installation is complete, but regular care is needed to keep it performing at its peak for its 15 to 20-year lifespan. Fortunately, mini-split maintenance is straightforward.

Essential Maintenance for Longevity and Efficiency
- Clean Filters Monthly: Dirty filters restrict airflow and reduce efficiency. Most filters slide out easily. Rinse them with warm, soapy water, let them air dry completely, and slide them back in.
- Keep the Outdoor Unit Clear: Ensure the condenser has at least 24 inches of clearance. Regularly remove leaves, grass clippings, snow, and other debris that can block airflow.
- Check the Condensate Drain: Periodically check that water is flowing freely from the outdoor end of the drain line to prevent clogs and water backups.
- Schedule Annual Professional Tune-Ups: A technician will check refrigerant levels, clean internal coils, inspect electrical connections, and catch minor issues before they become major problems.
Troubleshooting Common Mini-Split Issues
If your system isn't working correctly, check these common issues before calling for service:
- Poor Cooling: The most common cause is a dirty filter. Also, check that the outdoor unit is not blocked by debris.
- Water Dripping Indoors: This usually indicates a clogged condensate line or an unlevel indoor unit.
- Strange Noises: Grinding, rattling, or loud buzzing often means a part is loose or wearing out and requires professional diagnosis.
- Frequent Cycling: "Short-cycling" wastes energy and can indicate sizing or sensor issues. This requires a professional to diagnose.
Many systems display error codes when there's a problem. Check your owner's manual to understand the code before calling for service.
Frequently Asked Questions about Ductless Mini-Split Installation
Can I install a ductless mini-split entirely by myself?
While you can perform the physical mounting of the indoor and outdoor units, the final connections are not a DIY job. For safety, code compliance, and warranty protection, all high-voltage electrical work and refrigerant handling (vacuuming the lines, charging the system) must be performed by a licensed professional with EPA 608 certification.
How much does a professional ductless air conditioning installation cost?
A single-zone system typically costs between $2,000 and $5,000 for a complete professional installation, including the unit. Multi-zone systems can range from $5,000 to $15,000. Labor and professional services often account for 50-60% of the total price. That new electrical work, if needed, can add $500 to $2,000 to the project.
How long do ductless mini-splits last?
With proper professional installation and consistent maintenance (like regular filter cleaning and annual tune-ups), a high-quality ductless mini-split system has a typical lifespan of 15 to 20 years. This makes it an excellent long-term investment in your home's comfort.
Conclusion
We've covered the entire ductless air conditioning installation process, highlighting the balance between DIY satisfaction and professional expertise. By handling the physical mounting yourself and trusting licensed professionals for the critical electrical and refrigerant connections, you ensure your system will operate safely and efficiently for its full 15-20 year lifespan.
The rewards of a properly installed ductless system are significant: energy savings of up to 30%, whisper-quiet operation, improved indoor air quality, and the luxury of individual room temperature control.
At Veteran Heating, Cooling, Plumbing & Electric, we believe in doing things right the first time. Our lifetime warranty on parts and labor is our commitment to the communities of Denver, Lakewood, Littleton, and beyond. We are here to ensure your ductless air conditioning installation delivers years of reliable comfort.
Ready to finish your installation with professional precision? Explore our comprehensive HVAC services and let our certified team handle the technical connections while you enjoy the satisfaction of a job well done.
ABOUT Veteran Heating, Cooling, Plumbing & Electric
Veteran Heating, Cooling, Plumbing & Electric was founded on the belief that service should be personal, honest, and community-focused. Our team is built around integrity, professionalism, and a true commitment to your home’s comfort and safety.
Led by a U.S. Army veteran with over 30 years of industry experience, we’re proud to remain locally owned and operated. Every technician, plumber, and electrician is EPA-certified, background checked, and driven to exceed expectations.
- 24/7 ServiceWe offer weekend & 24/7 emergency service. We’re here whenever you need us—day, night, or weekend, no exceptions.
- $0 Trip FeesNo dispatch or trip fees. You’ll never pay just for us to show up—service starts when the work does.
OUR SERVICES
AIR CONDITIONING
.jpg)
We offer specialty and seasonal services like indoor air quality upgrades, pre-winter furnace checks, and summer AC tune-ups to keep your home prepared year-round.
Our Primary Air Conditioning Services Include:
Don't see the service you need? Call our Team today!
PLUMBING
From leaks to full system installs, our plumbing services cover everything you need for a safe, reliable home water system, 24/7.
Our Primary Plumbing Include:
- Water Heater Replacement
- Water Heater Repair
- Trenchless Sewer Line
- Water Filtration
- Slab Leak
- Sewer Line Repair
Don't see the service you need? Call our Team today!
ELECTRICAL

Our electrical services ensure your home stays safe and powered, from routine fixes to complete system upgrades.
Our Primary Electrical Services Include:
- House Rewiring
- Electrician
- Electric Panel Upgrade
- Electric Panel Replacement
- EV Chargers
- Whole House Generator
Don't see the service you need? Call our Team today!
HEATING
.jpg)
We install, repair, and maintain heating & furnace systems with expert care to keep your Colorado home comfortable and energy-efficient year-round.
Our Primary Heating Services Include:
- Heating Installation
- Heating Replacement
- Heating Maintenance
- Heating Repair
- Heating Service
- Heating Tune-Up
Don't see the service you need? Call our Team today!