Why Proper Ductwork Design is Critical for Your Home's Comfort
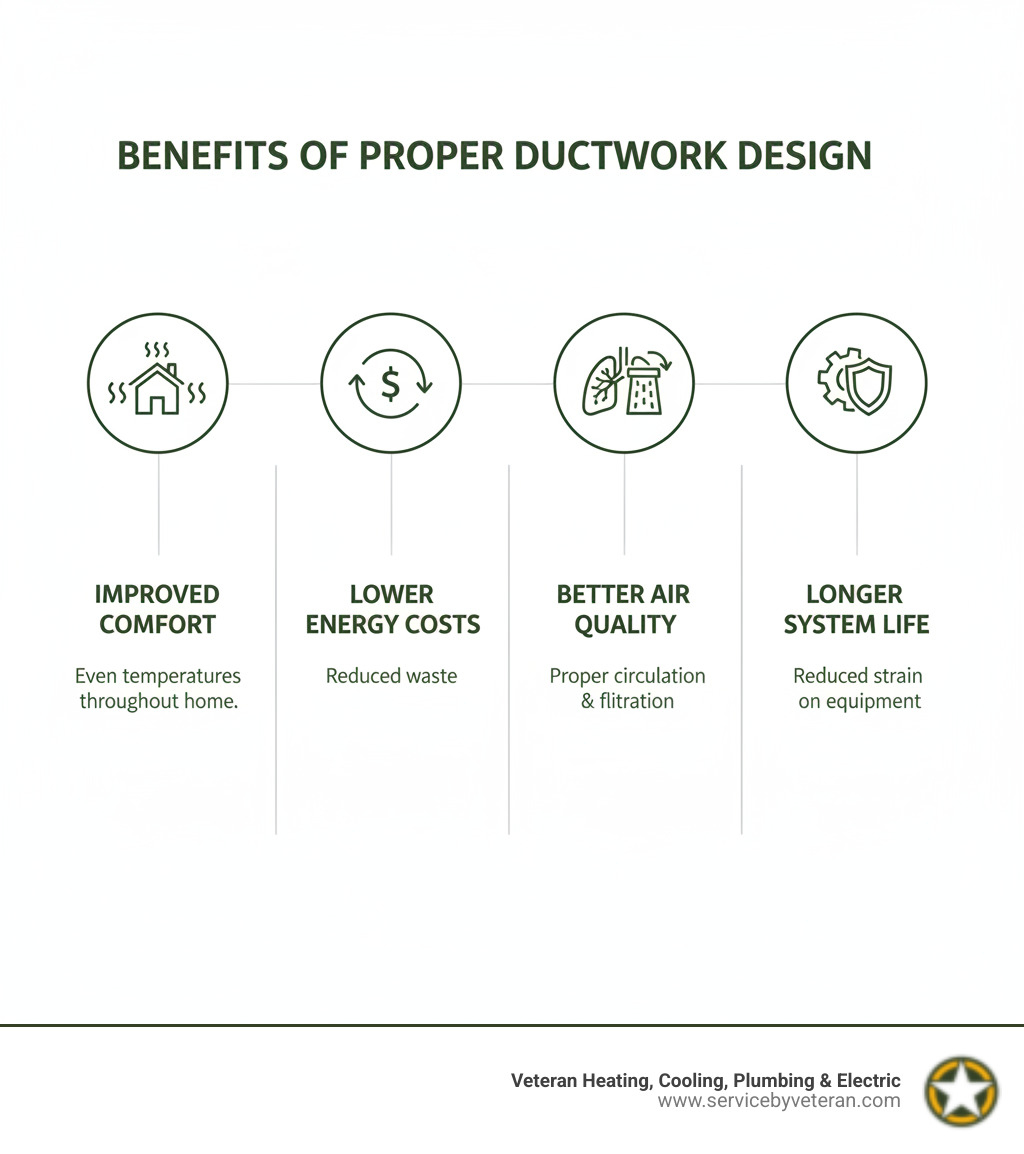
Ductwork design is the foundation of an efficient HVAC system, determining how well your home heats, cools, and maintains healthy indoor air quality. Poor ductwork design can lead to several costly problems:
- High utility bills - Leaky or improperly sized ducts waste 30% or more of your energy
- Hot and cold spots - Uneven temperatures throughout your home
- Poor indoor air quality - Inadequate air circulation and filtration
- Reduced system lifespan - Your HVAC equipment works harder and fails sooner
- Uncomfortable living spaces - Rooms that never reach the right temperature
The science behind effective ductwork isn't complicated, but it requires following proven principles. Air has weight - about 0.08 pounds per cubic foot - and your blower motor must move this heavy air through your entire home. When ducts are poorly designed, your system struggles like a person trying to breathe through a straw.
Modern ductwork design follows scientific methods developed by the Air Conditioning Contractors of America (ACCA), specifically their Manual D protocol. This approach calculates the exact airflow needs for each room and sizes ducts accordingly, replacing the old "rule of thumb" methods that often failed homeowners.
I'm Mike Townsend, and during my eight years in the U.S. Army, I managed precision cooling systems for heat-seeking missile heads - work that required absolute attention to detail in airflow and temperature control. That technical background now guides how I approach ductwork design for homes, ensuring every system delivers the comfort and efficiency families deserve.
The Physics of Airflow: Core Principles of Effective Ductwork Design
Understanding how air moves through your home is the foundation of great ductwork design. Here's something that might surprise you: air has weight - about 0.08 pounds per cubic foot. When your 2.5-ton air conditioner needs to move 1,000 cubic feet per minute, that's roughly 81 pounds of air every single minute!
Your blower motor is essentially a weightlifter, working against resistance to push all that air through your ductwork. The harder it has to work, the more energy it uses and the less comfortable your home becomes.

This resistance comes from two main culprits: friction and turbulence. Friction happens when air rubs against the inside walls of your ducts - think of it like water flowing through a garden hose. The rougher or smaller the hose, the harder it is for water to flow smoothly.
Turbulence is even more problematic. It occurs when air hits sharp bends, sudden size changes, or poorly designed fittings. Imagine trying to pour water through a funnel with sharp corners versus one with smooth, curved sides. The smooth funnel works much better, and the same principle applies to your ducts.
Static pressure is like blood pressure for your HVAC system. When ducts are too small or have too many restrictions, static pressure builds up. High static pressure means your blower motor struggles to deliver air, leading to hot and cold spots, higher energy bills, and equipment that wears out faster.
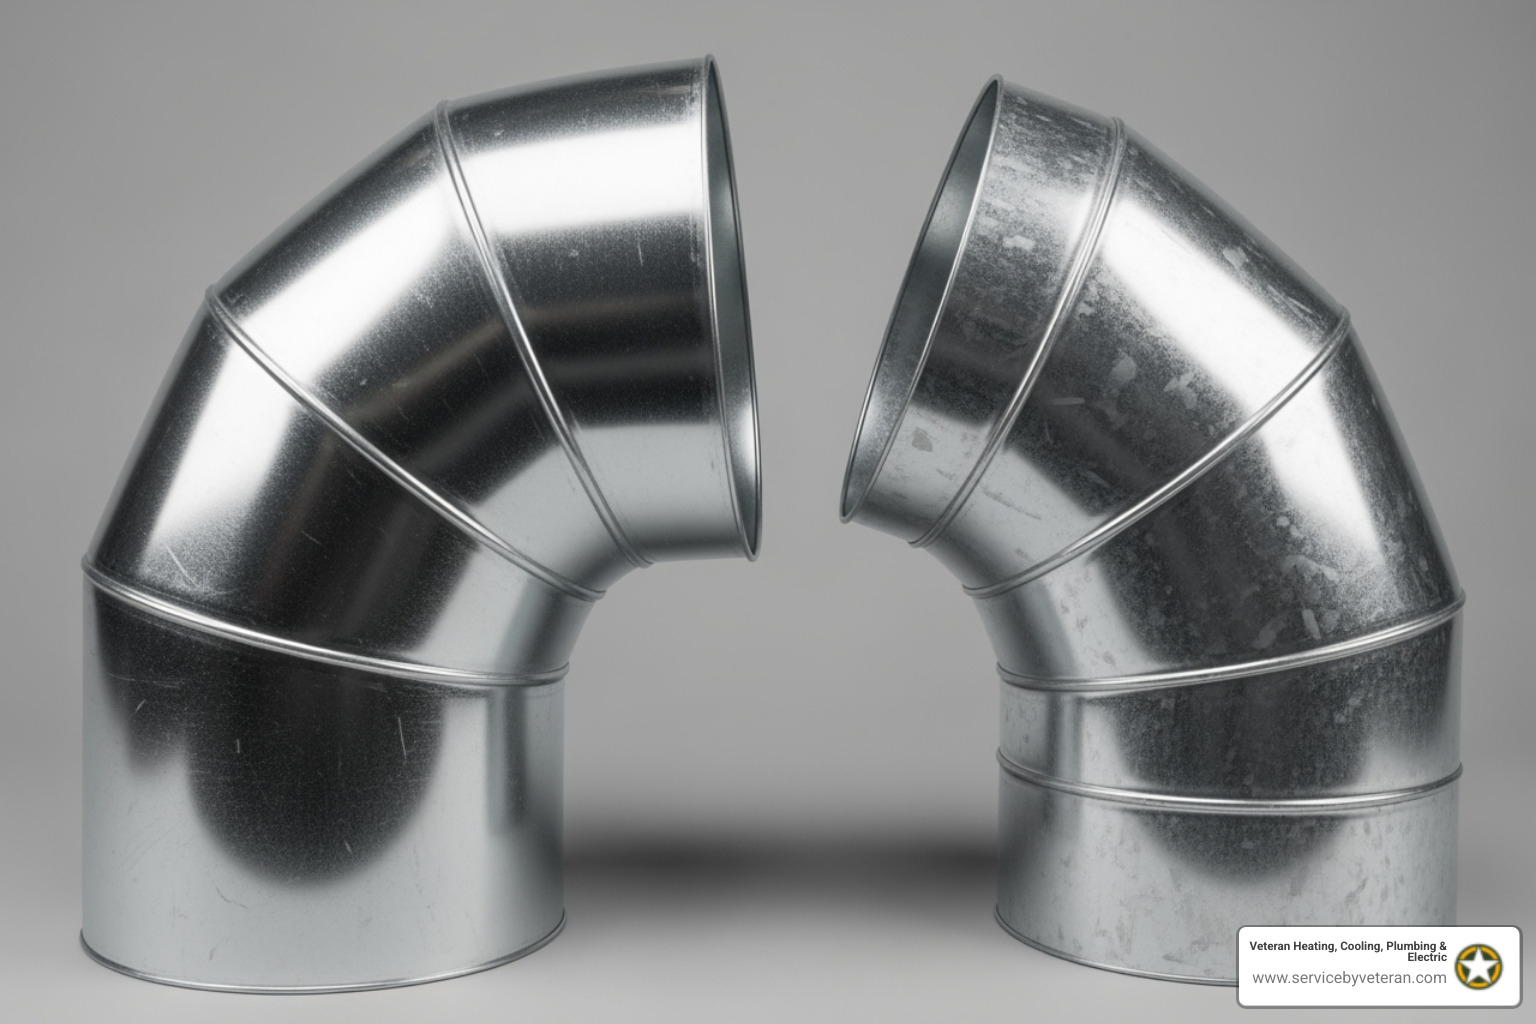
One of the most important concepts in ductwork design is Total Effective Length (TEL). This isn't just measuring your ducts with a tape measure. TEL accounts for all the friction and turbulence from every bend, fitting, and component in your system. A sharp 90-degree elbow can add the equivalent of 60 to 120 feet of straight duct to your TEL! That's why we use smooth, radius elbows whenever possible.
Duct sizing makes a huge difference too. Undersized ducts are like trying to drink a milkshake through a coffee stirrer - your system works overtime but delivers disappointing results. Oversized ducts might seem better, but they can actually reduce air velocity too much, leading to poor air mixing and temperature stratification.
The importance of duct sealing cannot be overstated. Leaky ductwork can waste 30% or more of your conditioned air. You're literally paying to heat or cool your attic instead of your living room! These leaks also create pressure imbalances that make some rooms stuffy while others never reach the right temperature.
When everything works together - proper sizing, smooth bends, sealed connections, and balanced pressure - your system operates efficiently and quietly. For more details on how we optimize your entire HVAC system, check out more info about our HVAC services.
The Critical Role of the Return Air System
Your HVAC system is like a giant lung for your home. It can't exhale fresh, conditioned air effectively if it can't inhale stale air properly. The return air system is often the forgotten half of the equation, but it's just as critical as the supply ducts.
Balanced pressure is the key to comfort. When your system pushes conditioned air into a room through supply ducts, that air needs somewhere to go. Without adequate return air paths, you create pressure imbalances that cause all sorts of problems.
Poor air circulation happens when rooms can't return air properly. The conditioned air gets trapped, creating stuffy conditions and preventing fresh air from entering. You might notice doors slamming shut when your system kicks on - that's a telltale sign of pressure problems.
Filtration effectiveness also depends on proper return air flow. When your system can't pull air back through the filter efficiently, dust and allergens stay trapped in your living spaces instead of being captured and removed.
The ideal solution is dedicated return ducts in every room that has a supply vent. This creates a perfectly balanced system where air flows in and out of each space smoothly. While this isn't always possible in existing homes, solutions like transfer grilles above doors or short "jumper ducts" can help balance pressure.
Preventing negative pressure is crucial for both comfort and safety. When rooms become negatively pressurized, they can pull unconditioned air from attics, crawl spaces, or even outdoors. This not only wastes energy but can also draw in dust, moisture, and pollutants.
When sizing return ducts, we typically aim for about 120% of the supply air volume. This slight oversizing ensures your system can breathe freely and maintains proper air circulation throughout your home.
Understanding Key Ductwork Components
Think of your ductwork as a highway system for air, with each component playing a specific role in moving conditioned air efficiently throughout your home.
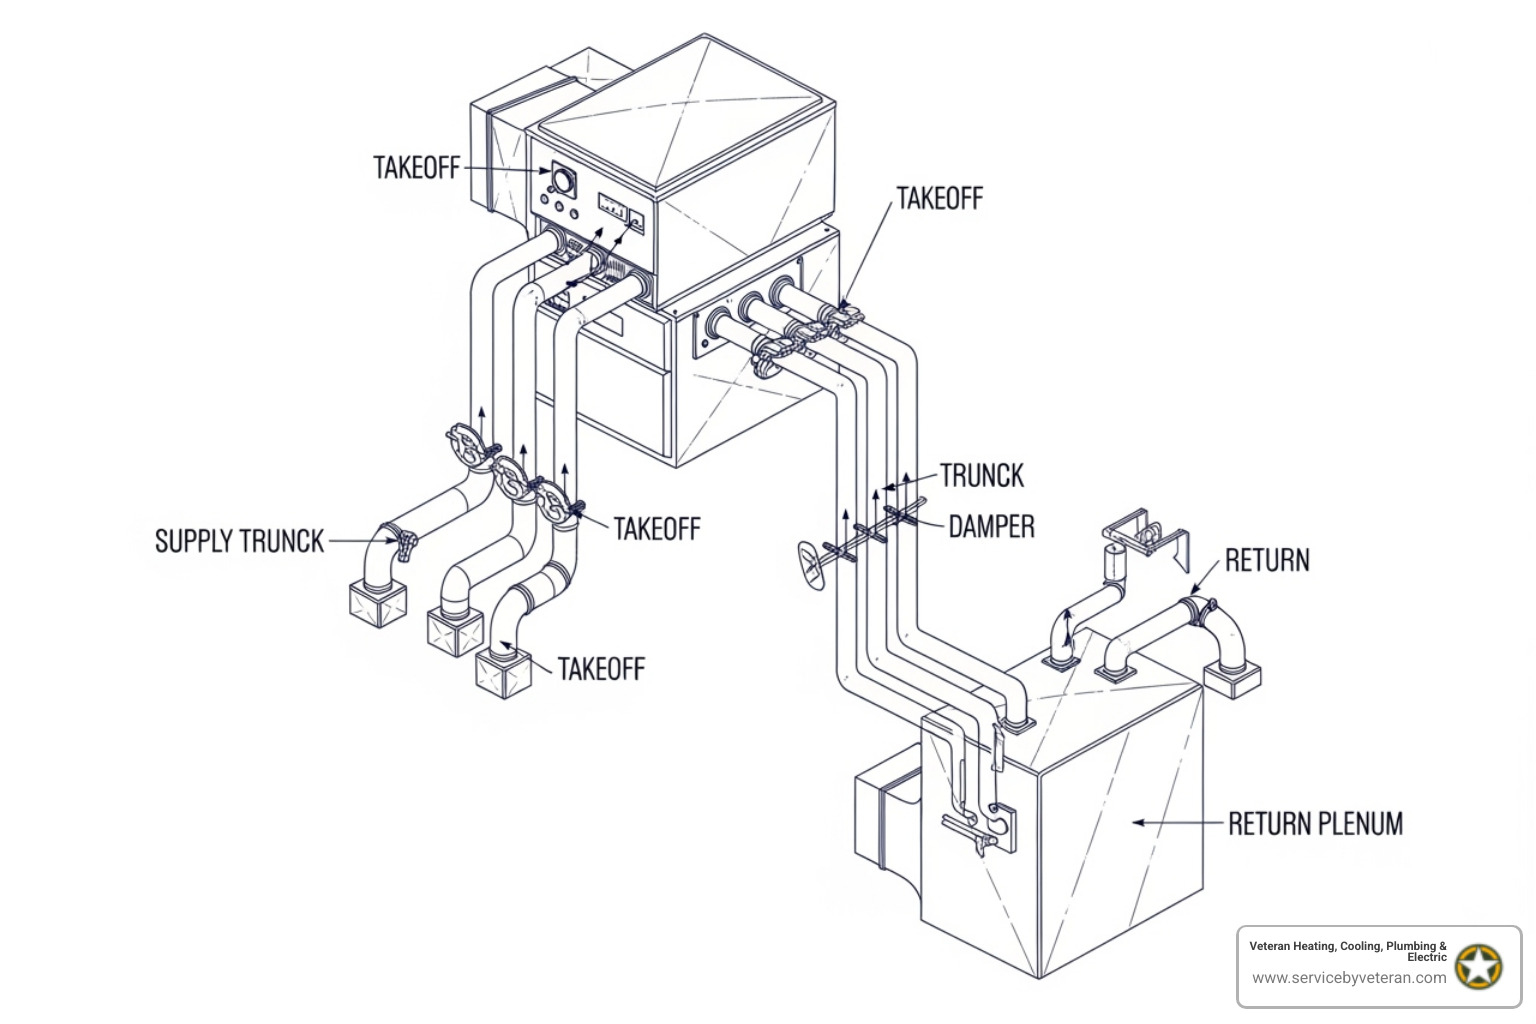
The plenum is like the central hub of your system. These large boxes connect directly to your furnace or air handler - one for supply air going out, and one for return air coming back. The plenum evens out air pressure and acts as a distribution center for your entire system.
Trunk lines are the main highways, carrying the bulk of your air from the plenum toward different areas of your home. We design these to be as square as possible to minimize friction, and we limit their length to maintain strong airflow. Generally, trunk lines shouldn't exceed 24 feet without reducing in size, or 48 feet total from a centrally located unit.
Branch lines are like local roads that split off from the trunk lines to serve individual rooms. The connection points, called takeoffs, are critical for maintaining good airflow. We follow the "Rule of Two Feet" - no takeoffs within 24 inches of where a trunk line ends, and never in the end cap itself. This prevents upstream branches from being starved of air.
Dampers act like traffic lights, allowing us to balance airflow to different areas. These adjustable plates help us fine-tune your system so every room gets the right amount of conditioned air.
Finally, grilles and registers are what you actually see in your walls, floors, or ceilings. Supply registers deliver conditioned air, while return grilles collect air to send back to your system. Even these visible components affect system performance - poorly designed grilles can create unnecessary pressure drops that hurt efficiency.
When all these components work together in a well-planned ductwork design, your system operates quietly, efficiently, and keeps every room comfortable year-round.
The ACCA Method: A Step-by-Step Guide to Planning Your System
When it comes to professional ductwork design, we don't just wing it – we follow a proven scientific approach. The Air Conditioning Contractors of America (ACCA) has developed comprehensive protocols that serve as the gold standard for HVAC professionals nationwide. These aren't optional guidelines; they're the foundation of every comfortable, efficient system we install.
At Veteran, we strictly follow these Professional Standards set by the ACCA because they work. After years of military precision in managing complex cooling systems, I've seen what happens when you cut corners on proper planning. The ACCA method takes a room-by-room approach, treating each space in your home as unique rather than making broad assumptions.
This detailed analysis is what separates professional ductwork design from the old "rule of thumb" methods that left so many homeowners frustrated with uneven temperatures and sky-high energy bills.
Step 1: Calculate Heating & Cooling Loads (Manual J)
Before we touch a single piece of ductwork, we need to understand exactly what your home demands. Think of it like getting a prescription for glasses – you wouldn't want your eye doctor to guess your vision needs, and you shouldn't want us guessing your comfort needs either.
Manual J calculations go far beyond simply measuring square footage. We analyze your home like detectives, examining every factor that affects temperature. Room dimensions tell us the volume of air we need to condition. Window sizes and orientations reveal how much heat the sun adds in summer or steals in winter. Insulation levels in your walls, attic, and floors determine how well your home holds onto that precious conditioned air.
We also consider building orientation – a west-facing room with large windows will need more cooling than a north-facing bedroom. Even factors like how many people typically use each room and what appliances generate heat matter in our calculations.
This meticulous process gives us the precise BTU requirements for every single room. Without these accurate numbers, any ductwork design would be like trying to hit a target in the dark. You can learn more about the technical details in ACCA's Manual J.
Step 2: Select the Right Equipment (Manual S)
Once we know exactly what each room needs, we can select equipment that's perfectly matched to your home's requirements. This is where Manual S becomes our guide, helping us choose not just the right size system, but the right system for your specific situation.
Equipment selection involves more than picking a furnace or air conditioner with the right total capacity. We need to ensure the blower capacity can move the exact amount of air (measured in CFM) that our Manual J calculations determined. Think of it like matching an engine to a car – you need enough power to do the job, but not so much that you're wasting fuel.
We also factor in system efficiency ratings like SEER to ensure you're getting maximum comfort for every dollar you spend on energy. The goal is finding equipment that meets your home's needs while operating at peak efficiency, providing consistent comfort without overworking itself.
This careful matching process, outlined in ACCA's Manual S protocol, ensures your system will run smoothly for years to come.
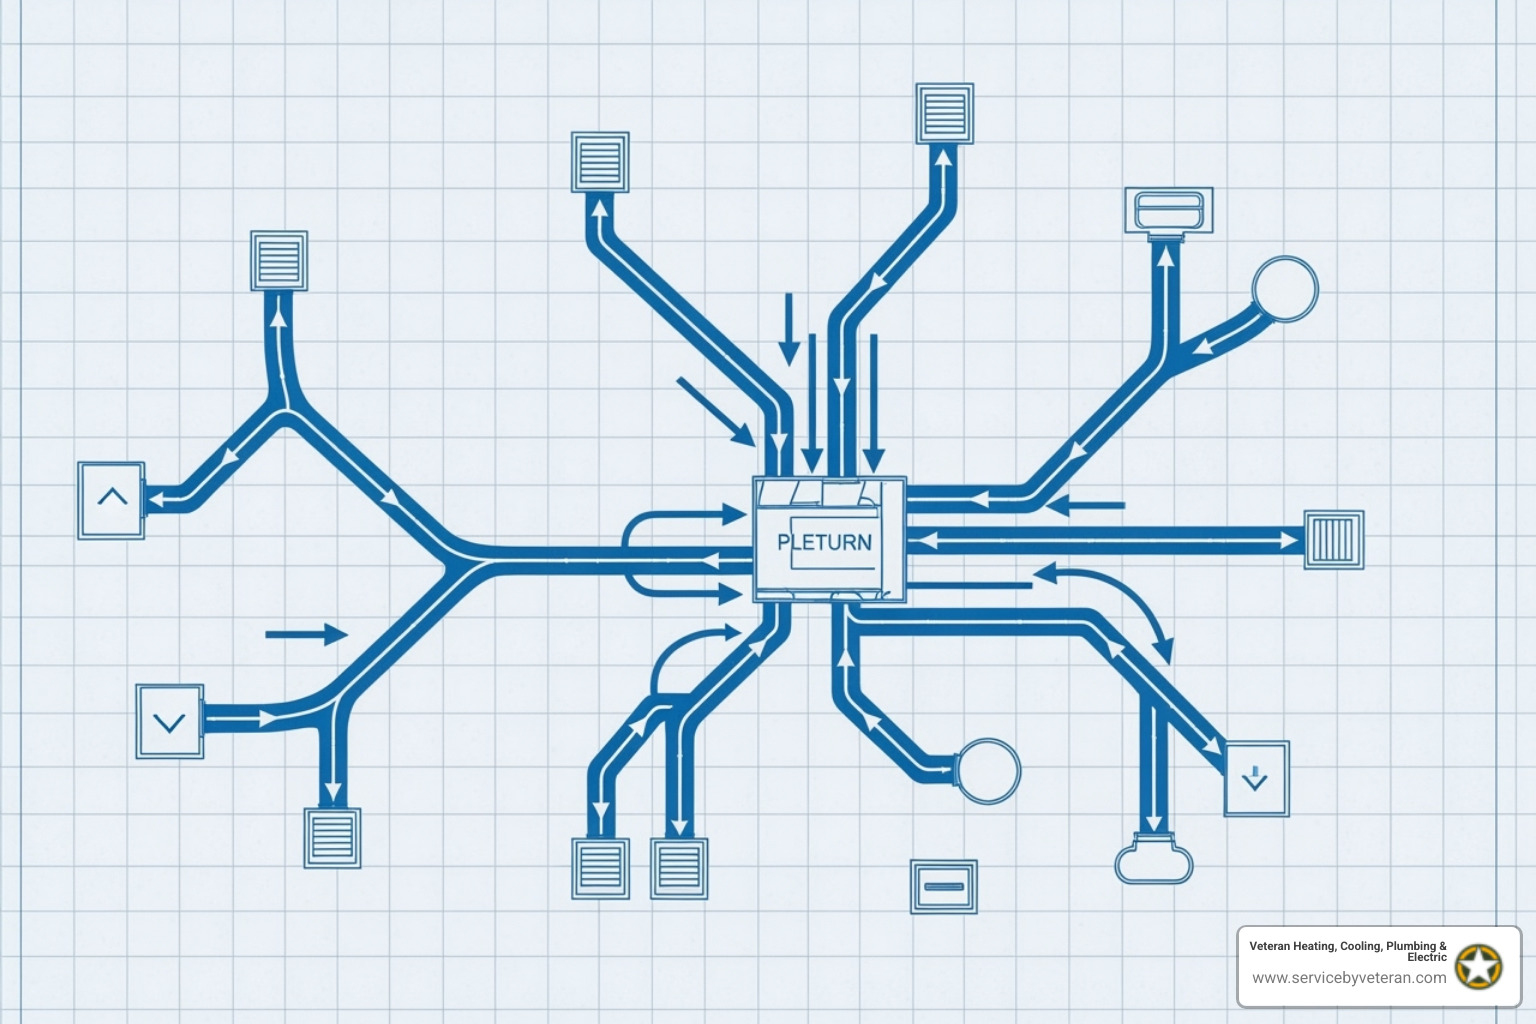
Step 3: Create the Ductwork Design (Manual D)
Now comes the exciting part – creating the actual ductwork design that will deliver perfect comfort to every room. Manual D takes all our previous calculations and transforms them into a detailed blueprint for your duct system.
Duct layout planning starts with mapping the most efficient paths from your equipment to each room. We design trunk lines to act like main highways, carrying large volumes of air efficiently. Branch lines then split off like exit ramps, delivering the precise amount of air each room needs.
Sizing calculations are critical here. Each duct must be perfectly sized – too small and you'll get restricted airflow, too large and you'll have poor air mixing and velocity problems. We calculate the friction rate for the entire system, ensuring your blower can overcome resistance without working overtime.
Airflow balancing ensures every register delivers its calculated CFM. We strategically plan damper locations and register placement to promote even air distribution while avoiding drafts or dead zones.
A proper ductwork design ensures comfort throughout your home while maximizing energy efficiency and system lifespan. It's precise engineering that guarantees every room receives exactly the right amount of conditioned air, keeping your family comfortable year-round.
Avoiding Pitfalls: Common Ductwork Design & Installation Mistakes
After eight years managing precision cooling systems in the military, I've learned that even small mistakes can lead to big problems. The same holds true for residential ductwork design. I've walked into countless homes where well-meaning contractors or ambitious DIYers created systems that looked fine on the surface but performed terribly underneath.
Poor ductwork isn't just uncomfortable - it hits your wallet hard. You'll see reduced airflow that leaves some rooms stuffy while others feel like wind tunnels. Your energy bills skyrocket because your system works overtime trying to compensate. Noisy operation becomes the soundtrack of your home, with whooshing, rattling, or whistling sounds every time the system kicks on. Worst of all, premature equipment failure means you're replacing expensive components years before you should.
The good news? Most of these problems are completely preventable with proper planning and installation. For more insights on keeping your home systems running smoothly, check out our expert blog.
[LIST] of Top 5 Ductwork Blunders
Here are the mistakes I see most often, and why they matter so much:
- Undersized Ducts and Returns - This is like trying to drink a milkshake through a cocktail straw. Your system can't move enough air, creating high pressure that stresses your equipment and leaves rooms uncomfortable.
- Too Many Sharp Bends - Every sharp 90-degree turn adds the equivalent of 60 to 120 feet of straight duct in terms of resistance. It's like forcing air to make sudden U-turns instead of gentle curves.
- Leaky Connections and Poor Sealing - These invisible energy thieves can waste over 30% of your conditioned air, sending it straight into your attic or crawl space instead of your living room.
- Long, Complicated Duct Runs - The more your ductwork resembles a maze, the harder your blower motor works. Simple, direct paths are always better.
- Placing Ducts in Unconditioned Spaces - Putting ducts in hot attics or cold crawl spaces is like wrapping ice cream in a heating pad. You're fighting the environment every step of the way.
How to Prevent Common Errors in Your Ductwork Design
At Veteran, we've developed strategies to avoid these costly mistakes from day one. Using smooth, gradual turns instead of sharp bends makes an enormous difference in airflow. We choose radius elbows and gentle transitions that guide air naturally rather than forcing it to change direction abruptly.
Sealing all joints with mastic is non-negotiable in our installations. Forget about traditional "duct tape" - it's actually terrible for sealing ducts long-term. We use professional-grade mastic sealant combined with mechanical fasteners to create airtight connections that last for decades.
For any ductwork that must run through unconditioned spaces, we insulate ducts thoroughly. Supply ducts get at least R-8 insulation, while return ducts receive R-6 minimum. This prevents your expensive conditioned air from fighting against extreme attic or crawl space temperatures.
We always keep runs short and direct in our designs. The shortest path between your equipment and each room isn't just efficient - it's also more reliable and easier to maintain. Every unnecessary foot of ductwork adds resistance and potential failure points.
Finally, we ensure return air paths stay unobstructed. Your system needs to breathe in as well as breathe out. Whether through dedicated return ducts in each room or carefully planned transfer grilles and jumper ducts, we make sure air can flow back to your system easily. This prevents pressure imbalances that can make doors slam and rooms uncomfortable.
Advanced Concepts: Tools and Special Considerations
While the core principles of ductwork design remain consistent, the application can vary dramatically depending on your project's scope. Whether we're designing a system for a cozy ranch home in Castle Rock or planning HVAC for a multi-story office building in Aurora, each situation brings unique challenges and requirements.
FeatureResidential Ductwork DesignCommercial Ductwork DesignSystem ScaleTypically 1-5 tons of cooling capacity, serving 1,000-4,000 sq ftOften 10-100+ tons, serving thousands to millions of sq ftZoning ComplexitySimple 1-2 zone systems, basic thermostatsMulti-zone VAV systems, sophisticated building automationFire CodesBasic residential fire stopping requirementsStrict commercial fire/smoke damper requirements, compartmentalizationMaterial DifferencesFlexible ductwork common, residential-grade sheet metalRigid sheet metal systems, heavy-gauge materials, specialized fittingsVentilation RequirementsSimple exhaust fans, basic fresh air needsComplex outside air systems, energy recovery, precise ventilation rates
Residential vs. Commercial Ductwork
The jump from residential to commercial ductwork design isn't just about size - it's about complexity. In homes, we typically work with systems that move 400-2,000 CFM of air through relatively straightforward layouts. Commercial buildings might require 50,000 CFM or more, with intricate zoning systems that can adjust airflow room by room throughout the day.
Material choices also shift dramatically. While flexible ductwork works well for short residential runs, commercial systems rely heavily on rigid sheet metal construction. The gauges are heavier, the fittings more robust, and everything must meet stricter fire safety codes. Commercial buildings require fire dampers, smoke dampers, and compartmentalization that simply doesn't exist in residential work.
Zoning complexity represents another major difference. Your home might have two zones - upstairs and downstairs. A commercial building could have dozens of zones, each with variable air volume (VAV) boxes that automatically adjust airflow based on occupancy and temperature needs. These systems integrate with sophisticated building automation that can optimize energy use throughout the day.
Ventilation requirements become much more demanding in commercial applications. While residential systems might bring in fresh air through a simple duct connection, commercial buildings require dedicated outside air systems, often with energy recovery ventilators to pre-condition incoming air. The calculations become complex, accounting for occupancy loads, building usage, and strict indoor air quality standards.
Software and Tools for Duct Design
Modern ductwork design relies increasingly on specialized software, though understanding the underlying principles remains crucial. Professional design software can handle the complex calculations involved in Manual D protocols, automatically sizing ducts and calculating pressure drops throughout the system.
CAD software helps us visualize duct layouts in three dimensions, ensuring everything fits within the building structure before installation begins. This prevents costly surprises during construction and helps optimize routing for maximum efficiency.
Load calculation tools streamline the Manual J process, though they're only as good as the data you input. These programs can quickly calculate room-by-room heating and cooling loads, but they require accurate measurements and building specifications.
Manual D calculators take the tedium out of friction rate calculations and duct sizing, but they can't replace understanding the physics involved. The software might tell you to use a 6-inch duct, but you need to understand why that size was chosen and whether it makes sense for your specific installation.
The key insight here is that while these tools are incredibly powerful, they're most effective when used by someone who understands airflow principles. Software can calculate, but it takes experience to know when those calculations don't account for real-world installation challenges or unique building characteristics. For deeper insights into airflow principles, An excellent summary of airflow principles provides additional technical background.
At Veteran, we combine the precision of modern design software with decades of hands-on experience to create systems that work perfectly in the real world, not just on paper.
ABOUT Veteran Heating, Cooling, Plumbing & Electric
Veteran Heating, Cooling, Plumbing & Electric was founded on the belief that service should be personal, honest, and community-focused. Our team is built around integrity, professionalism, and a true commitment to your home’s comfort and safety.
Led by a U.S. Army veteran with over 30 years of industry experience, we’re proud to remain locally owned and operated. Every technician, plumber, and electrician is EPA-certified, background checked, and driven to exceed expectations.
- 24/7 ServiceWe offer weekend & 24/7 emergency service. We’re here whenever you need us—day, night, or weekend, no exceptions.
- $0 Trip FeesNo dispatch or trip fees. You’ll never pay just for us to show up—service starts when the work does.
OUR SERVICES
AIR CONDITIONING
.jpg)
We offer specialty and seasonal services like indoor air quality upgrades, pre-winter furnace checks, and summer AC tune-ups to keep your home prepared year-round.
Our Primary Air Conditioning Services Include:
Don't see the service you need? Call our Team today!
PLUMBING

From leaks to full system installs, our plumbing services cover everything you need for a safe, reliable home water system, 24/7.
Our Primary Plumbing Include:
- Water Heater Replacement
- Water Heater Repair
- Trenchless Sewer Line
- Water Filtration
- Slab Leak
- Sewer Line Repair
Don't see the service you need? Call our Team today!
ELECTRICAL

Our electrical services ensure your home stays safe and powered, from routine fixes to complete system upgrades.
Our Primary Electrical Services Include:
- House Rewiring
- Electrician
- Electric Panel Upgrade
- Electric Panel Replacement
- EV Chargers
- Whole House Generator
Don't see the service you need? Call our Team today!
HEATING
.jpg)
We install, repair, and maintain heating & furnace systems with expert care to keep your Colorado home comfortable and energy-efficient year-round.
Our Primary Heating Services Include:
- Heating Installation
- Heating Replacement
- Heating Maintenance
- Heating Repair
- Heating Service
- Heating Tune-Up
Don't see the service you need? Call our Team today!